Moving to a new bulk email platform is daunting. At least that’s what our clients say. But it’s actually pretty simple – all you have to do is export your contact list from one platform and import it onto ours. So, to put your mind at ease, and to address a common question we get from clients, here’s how to move your Mailchimp database to Everlytic.
Export Your Data from Mailchimp
- Log into your Mailchimp dashboard and click on the Audience menu item in the top navigation bar. This will open up the Audience panel.
- Click on the grey View Contacts button to the right of the screen. This will bring up a list of all your contacts.
- Click on the grey Export Audience button just above and to the right of the contact list. This will export all your contacts and send the list to you as a link via email.
- Open the Mailchimp email and click on the Download List Data button. This will download a zip file to your computer.
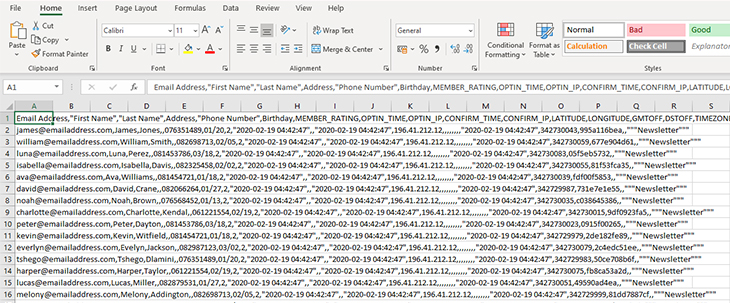
- In the zip file, you’ll find a Comma Separated Values file (csv). Open this up. The file will look something like this:
Reformat Your CSV Data File
Before you upload this file into Everlytic, you’ll need to separate each comma-separated field into its own column. Luckily, Microsoft Excel has a clever tool that enables you to do this easily. All you need to do is:
- Select column A.
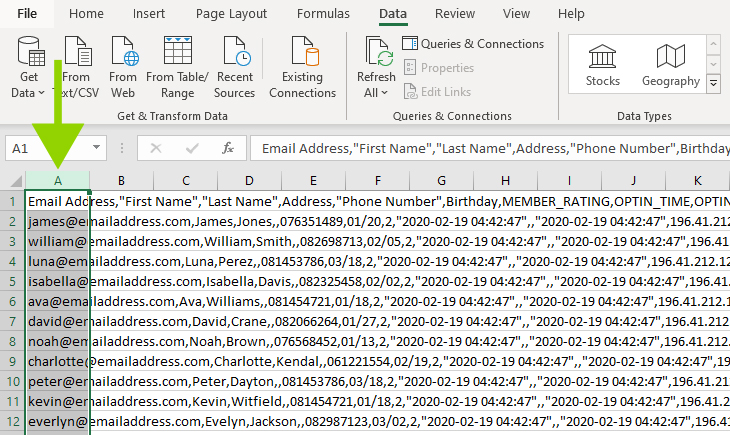
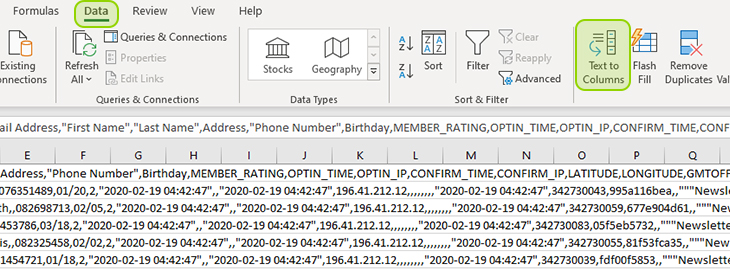
- Go to the Data tab in the top menu and click on the Text to Columns button in the Data Tools section.
- In step one of the ‘Convert-Text-to-Columns Wizard’, make sure the Delimited radio button is selected.
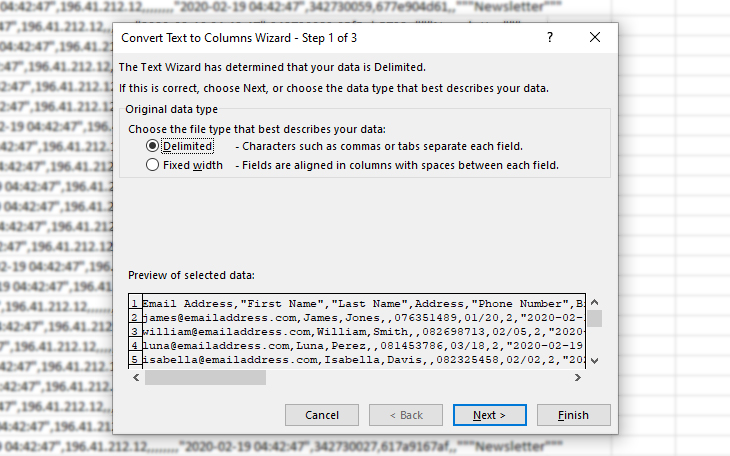
- Click Next.
- In step 2 of the wizard, the Tab delimiter checkbox will probably be auto-checked. Select the Comma one too.
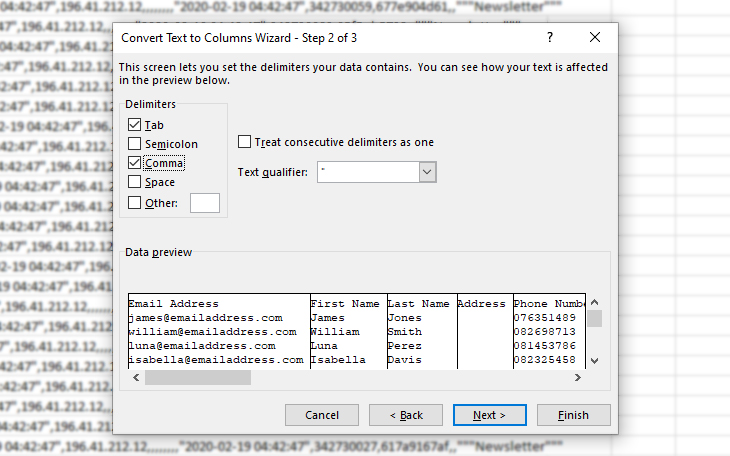
- From here, you can just click Finish.
The contact data in your spreadsheet should now be separated into columns. Save this file on your computer in CSV, TXT, XLSX, or XLS format. We recommend XLS or XLSX format as it’s simpler.
Tip: Browse through your data to make sure everything looks right. You can also select Ctrl + H on your keyboard to search for and replace any stray commas, inverted commas, or empty spaces.
Upload Your Data to Everlytic
Next, log into Everlytic and follow the standard upload process:
- Hover over the Contacts icon and click on Imports.
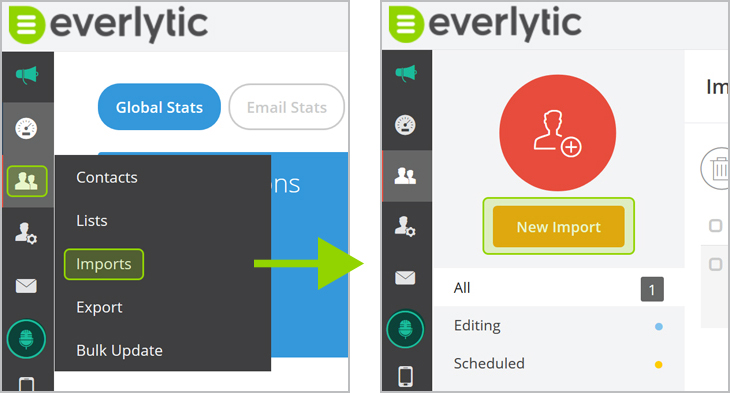
- Click on the orange New Import button in the top left corner of the screen.
- Select the red Upload option.
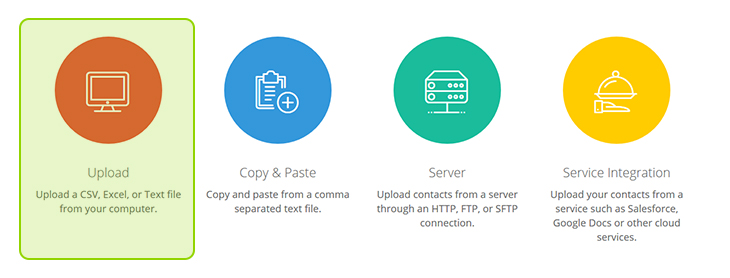
- Take note of the upload limits for the different file types. Then click Browse to find your newly reformatted contact file and click Open.

- This will take you to the field mapping page, where you can match the columns on your file to the fields in your database.
If you’ve uploaded a CSV file and the fields haven’t separated into columns in the upload, select the delimiter from the drop-down menu. This should separate the columns into separate fields again.
If it doesn’t, rather go back a step, save your CSV file as an XLS or XLSX file and upload that instead.
- Select whether you’d like to import the first row of your data. This will probably include field names like email address, first name, etc. This information isn’t needed for the upload as the field names will already reflect in the system, so you can uncheck this box.
- Specify how you’d like to identify unique contacts – by:
- Email or mobile (this is the default option)
- A unique ID created by you already
- A unique ID created by the system
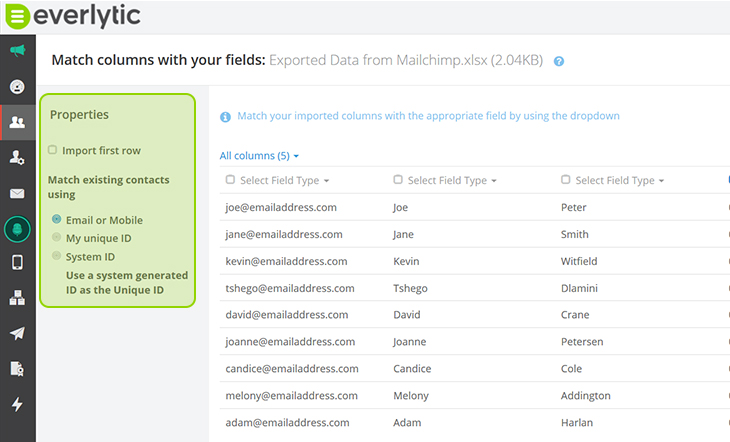
Unique IDs enable you to customise how you search the database, view contact reports, and update contact details. You can also sync this with your CRM or CMS platforms, so you have one identifier for all contacts across your platforms.
If you have a custom ID that you want to use to identify your contacts, you’ll need to create a custom field before you start the import. You can then assign it to your data in this step.
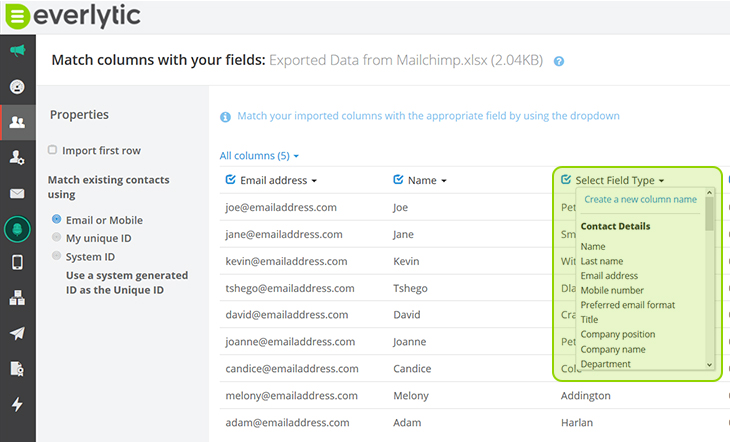
- Check the checkboxes of the fields that you’d like included in the import and specify the name of the field from the dropdown menu.
- Click Next.
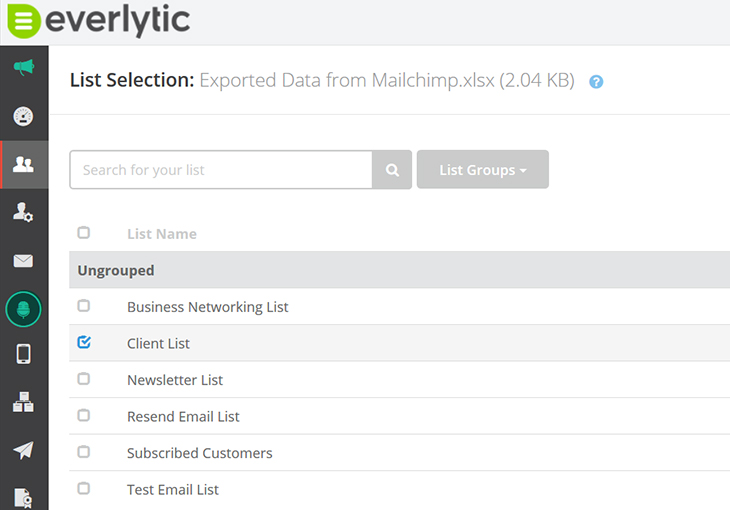
- On the next page, select which list you want to add the contacts to or create a new list by clicking on the Create List icon in the top right-hand corner.
- Click Next.
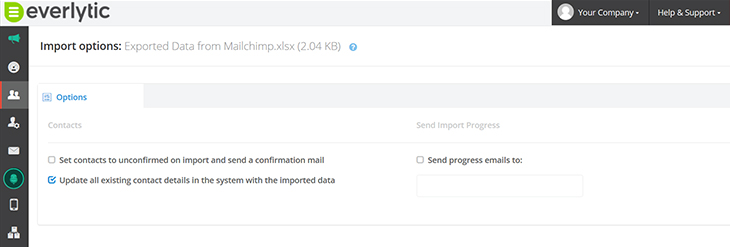
- On the Import Options page, specify if:
- You want to set contacts to unconfirmed and send them a confirmation email to confirm their subscription
- You want to update any existing contacts with the data in this list
- You want to send import progress emails to someone, and if so, which email address to use
- Click Next.
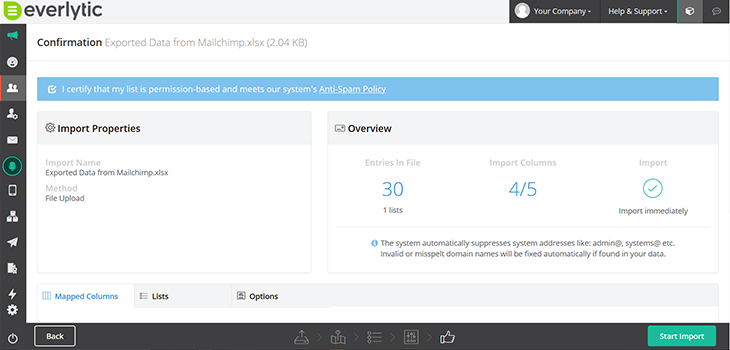
- The final confirmation page is where you double check all your import settings. If you’re happy to go ahead, check the checkbox confirming that your list meets our anti-spam policy and click Start Import.
And Voila! Your Mailchimp email database has been moved to Everlytic. ????


